DLTK's Crafts for Kids:
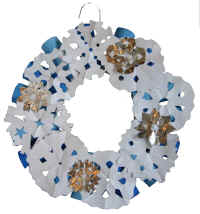
Snowflakes Wreath
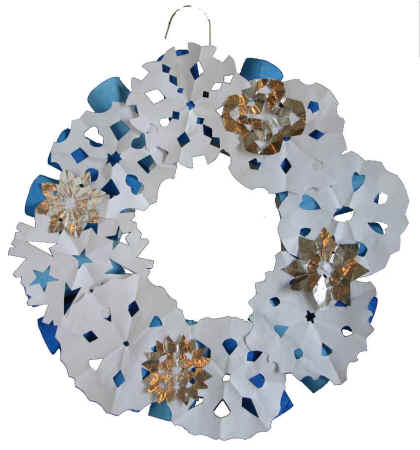 Making paper snowflakes has been a
wonderful way to celebrate the season for years. This tp roll wreath provides a great way to display your children's paper snowflake
creations. The diameter of the completed wreath is about 15 inches.
Making paper snowflakes has been a
wonderful way to celebrate the season for years. This tp roll wreath provides a great way to display your children's paper snowflake
creations. The diameter of the completed wreath is about 15 inches.
This craft is fun for older children (and adults!) - Age 6+. There are quite a few steps that younger kids (Age 2+) can help with, but they won't be able to do the craft independently. This is a good family project!
Materials:
- Wire coat hanger
- 14 to 16 tp rolls
- white paper (you could also use craft foam, gift wrap or aluminum foil)
- tape,
- glue,
- scissors
- Optional: Winter color paint like silver or blue
Instructions:
 ADULT: Take each tp roll and cut a slit HALFWAY through.
- Optional: Paint tp rolls a neutral color. You can see from the finished craft that not much shows through, but my kids have fun painting, so we painted them all shades of blue.
- Let dry.
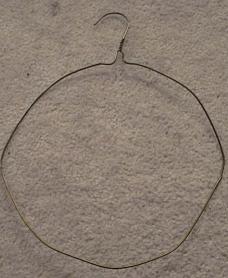 ADULT: Bend the coat hanger to form a circle.
- Using the slits cut halfway through the rolls, slide each of your tp rolls onto the hanger to form a big circle of tp rolls.
- Optional: Take a bit of masking or scotch tape and tape the tp rolls together. (tape the openings of the tp rolls on the inside of the circle together). This will keep the rolls from spinning around while you're working. If you choose not to do this, the paper snowflakes will keep everything from spinning on the finished craft
- Cut out many snowflakes. We made ours by hand from white computer paper and aluminum foil.
- I've provided a template you can choose to use. We just freehand cut our own!
- One person can be doing this part while another (daddy *grin*) is assembling the tp roll wreath base.
 Glue all the
snowflakes onto the tp roll base, overlapping so it's nice and full.
Glue all the
snowflakes onto the tp roll base, overlapping so it's nice and full.- Tie a bow on the top if you want to.
How to Make a Snowflake:
An adult can pre-do the first three steps to make 10 to 20 squares for the kids to make into paper snowflakes.
 We like to make smaller (5x5 ish) paper
snowflakes instead of great big ones. In order to do this, fold a piece of white paper or construction paper in half and cut down the fold so you
have two smaller rectangles.
We like to make smaller (5x5 ish) paper
snowflakes instead of great big ones. In order to do this, fold a piece of white paper or construction paper in half and cut down the fold so you
have two smaller rectangles.
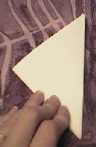
 Turn each rectangle into a square. Fold
your paper down and all the way across to make a triangle with a bit hanging over.
Turn each rectangle into a square. Fold
your paper down and all the way across to make a triangle with a bit hanging over.
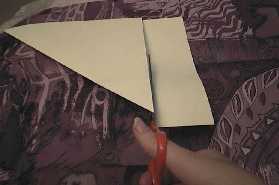 Cut off
the bit that's hanging over. Open up your paper and flatten it out. You now have a perfect square!!
Cut off
the bit that's hanging over. Open up your paper and flatten it out. You now have a perfect square!!
Note: Origami paper comes in appropriately sized squares and you can get winter patterns during the season at many craft stores. This is an Alternative to making your own squares (but I'm "thrifty" so I always make my own *grin*)
 Now that we have a square, let's make a snowflake!
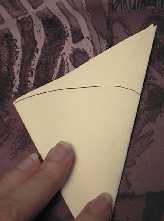
Fold your square in half (to make a rectangle)
 Then in half again to make a square.
 Now fold in half one last time (corner to corner this time) to make a triangle.
 Draw a curved line (optional) and cut off the top of the triangle.
Kids sometimes curve and cut off the wrong edge side of the triangle and end up with a snowflake that falls apart. Make sure the point of the triangle is the center of the paper.
 Cut a few little shapes out of your folded
paper (I usually make 4 cuts for small snowflakes like these).
Cut a few little shapes out of your folded
paper (I usually make 4 cuts for small snowflakes like these).
You can make them rounded, square, triangular or like half hearts -- have fun and experiment!)
I always like to make some sort of small snip in the bottom point.
NOTE: scrapbooking scissors with funny edged blades make wonderful snowflakes!
 Unfold and take a peek at your
snowflake. You can refold and make an extra snip or two if you like.
Unfold and take a peek at your
snowflake. You can refold and make an extra snip or two if you like.
Printable Craft Templates:
- After printing, close the template window to return to the main page.
- If the template doesn’t fit on one page, adjust your printer margins:
• In most browsers: Print → More settings → Margins → Minimum
• Or use Page Setup / Printer Setup in your printer dialog
Template 1 (color) or (B&W)
Template 2 (color) or (B&W)
Template 3 (color) or (B&W)
Template 4 (color) or (B&W)
Template 5 (color) or (B&W)
Template 6 (color) or (B&W)
Printable version of these instructions