DLTK's Holiday Crafts for Kids
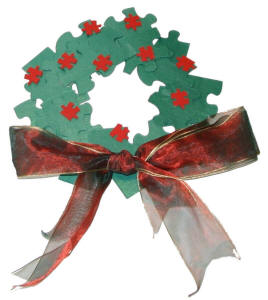
Christmas Puzzle Wreath
 We had a bunch of puzzles that had missing pieces and were no good to give away. This was a great project to make use of those puzzles.
Materials:
- old puzzle pieces
(preferably from a puzzle with missing pieces *wink*) - green paint
- paint brush
- glue
- large piece of scrap cardboard
Optional:
- old puzzle pieces (smaller than the first)
- red paint (These pieces will be the holly on the wreath.)
- red or gold ribbon to make a bow
 Instructions:
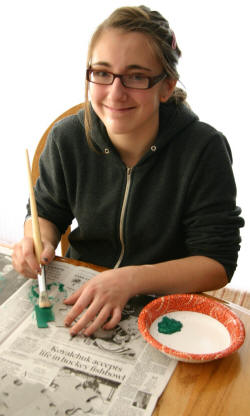
- Paint the backs of all the puzzle pieces green.
- Optional: If you are using the smaller red puzzle pieces option you can paint the backs of these at the same time.
- Give the paint some time to dry. If you use acrylic paint it will dry in just a matter of minutes.
- You might want to find a scrap piece of cardboard to build your wreath on. That way you have something sturdy enough to allow you to move your wreath before the glue is dry.
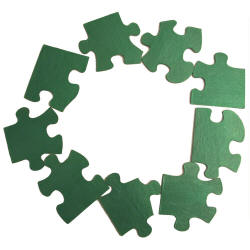
- Prepare the base layer by arranging the puzzle pieces in a circle with the painted side up on your piece of cardboard.
- We used nine puzzle pieces to make the base. Our puzzle pieces were quite large, about 3 inches square, so you will need more or less depending on how large your puzzle pieces are and how big you want your wreath to be.
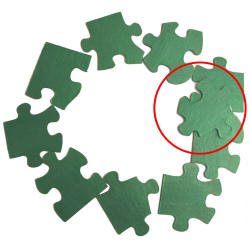
 Start the second layer of your wreath by putting glue on
half of two different puzzle pieces then lay the first piece
of the second layer across both puzzle pieces. (Remember Lego?).
Start the second layer of your wreath by putting glue on
half of two different puzzle pieces then lay the first piece
of the second layer across both puzzle pieces. (Remember Lego?).- Continue gluing the second layer making sure that each piece overlaps two pieces from the fist layer. Be generous with the glue.
- Once the second layer is done repeat the process to make a third layer being careful to overlap the third layer pieces across two puzzle pieces from the second layer.
-
 If you painted some smaller puzzle pieces red you can
add them randomly on top of the third layer to make it look like holly.
If you painted some smaller puzzle pieces red you can
add them randomly on top of the third layer to make it look like holly. - Tie the ribbon in a bow and glue it to your puzzle wreath.
Printable version of these instructions