DLTK's Holiday Crafts for Kids
Simple Shapes Coloring Pages for Christmas
Contributed by
These come in 1 per page, 2 per page and 4 per page versions. Here are some ideas for use:
 One per page:
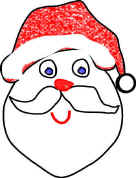
- Creative coloring pages: children can first
design their shapes - - a face for Santa, some buttons for the
gingerbread man, some swirly designs for an ornament -- and
then color or paint their design. The basic outline provides
some guidance for the child while still allowing for lots of
creativity.
Pull out some interesting things like cotton balls, large wiggly eyes and sequins to add to the creativity.
 Christmas books: Print 5 of the same template
and cut them out. Have the children author and illustrate
a simple Christmas story inside the shapes. About 4 pages
for the story is a good length with 1 more page as the cover.
Staple the book together.
Christmas books: Print 5 of the same template
and cut them out. Have the children author and illustrate
a simple Christmas story inside the shapes. About 4 pages
for the story is a good length with 1 more page as the cover.
Staple the book together.- the angel, bell, ornament, Santa, star, stocking and tree templates would all work well for this project.
 Lacing Crafts: see the
Lacing instructions for
details -- basically you just use a hole punch and punch around
the outside of the template then have the children weave wool,
string or ribbon through the holes.
Lacing Crafts: see the
Lacing instructions for
details -- basically you just use a hole punch and punch around
the outside of the template then have the children weave wool,
string or ribbon through the holes.
Two per page:
- Small Creative coloring pages - same as 1 per page
version (see above)
- Small Christmas books - same as 1 per page version (see above)
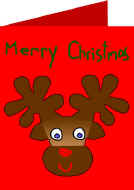 Gift Card front: Use creative coloring ideas
to decorate the image. Cut it out and glue it to the front
of a folded piece of construction paper.
Gift Card front: Use creative coloring ideas
to decorate the image. Cut it out and glue it to the front
of a folded piece of construction paper.- Write Merry Christmas on the top and a message on the inside
 Ornament: Trace the shape onto a piece of felt
or fun foam or even heavy card stock. Decorate with markers,
glitter glue, wiggly eyes, sequins etc. Punch a hole in
the top or one corner and thread a piece of ribbon through to
hang on the tree.
Ornament: Trace the shape onto a piece of felt
or fun foam or even heavy card stock. Decorate with markers,
glitter glue, wiggly eyes, sequins etc. Punch a hole in
the top or one corner and thread a piece of ribbon through to
hang on the tree.- For example, the holly could be cut from green fun foam with a red pom pom, red sequins or red glitter glued on to make the berry.
Four per page:
- Small Ornament: same as the two per page version (see above).
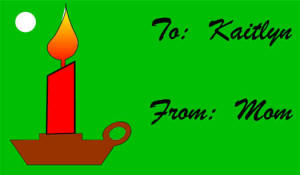 Gift Tags: Use creative coloring ideas to decorate
the image. Cut it out and print TO: _______
and FROM: ________ on the back to make a gift tag.
Punch a hole in the top corner and tie a ribbon on it (use the
ribbon to tape to a gift). You can even tie on a small
candy cane with the ribbon
Gift Tags: Use creative coloring ideas to decorate
the image. Cut it out and print TO: _______
and FROM: ________ on the back to make a gift tag.
Punch a hole in the top corner and tie a ribbon on it (use the
ribbon to tape to a gift). You can even tie on a small
candy cane with the ribbon
OR
Glue it to a rectangle of construction and print TO: _______ and FROM: ________ to the right of the image.
 Shrinky Dinks: see the
Shrinky Dink instructions
for details -- basically you just trace the image onto shrinky
dink paper, color with pencil crayon, cut out and bake to make
necklaces, charms, keychains or tiny tree ornaments.
Shrinky Dinks: see the
Shrinky Dink instructions
for details -- basically you just trace the image onto shrinky
dink paper, color with pencil crayon, cut out and bake to make
necklaces, charms, keychains or tiny tree ornaments.
Instructions:
- Click on the link of your choice (below) to print the template.
Printable Craft Templates:
- After printing, close the template window to return to the main page.
- If the template doesn’t fit on one page, adjust your printer margins:
• In most browsers: Print → More settings → Margins → Minimum
• Or use Page Setup / Printer Setup in your printer dialog