DLTK's Holiday Crafts for Kids
Corn Cob Craft
 Celebrate the colors and bounty of the fall harvest with this fun and simple Corn Cob Craft! Perfect for autumn-themed activities, classroom projects, or family craft time, this project lets kids explore textures, colors, and creativity while learning about one of fall’s most iconic foods. Whether you want to stick to paper and crayons or get a little messy with paints, tissue paper, or even popcorn, this craft can be adapted to suit children of all ages and skill levels.
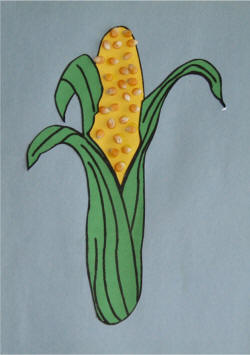
There’s plenty of room for creativity in this project. Children can color the corn kernels realistically or let their imagination run wild with bright, bold colors. For a more tactile experience, small pieces of yellow tissue paper or popcorn can be glued on to give the cob a 3D effect. Younger children may enjoy scrunching tissue paper into tiny “kernels,” while older kids can try using real popcorn for a more realistic look. The husks can also be decorated in many ways, making each child’s project truly unique.
Beyond being a fun hands-on activity, this craft is a great way to talk about the harvest season, fall foods, and family traditions. It’s a cheerful, educational, and creative way to bring a little autumn magic indoors!
Materials:
- paper,
- scissors,
- glue,
- something to colour with.
- Optional: construction paper.
- Optional: popcorn or yellow tissue paper if you choose to glue it onto the craft.
Instructions:
- Print out the craft template of choice.
- Colour pieces, as necessary. (For a change of pace, try using different mediums than you typically do, such as paints or ripped pieces of tissue paper).
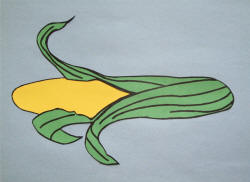
- Cut out the pieces. This step may require adult assistance.
- Glue the template husk onto the corn cob.
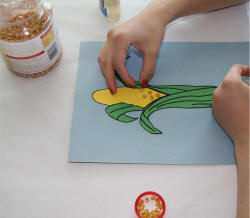
- Optional: Glue the corn with husk onto a background piece of heavy paper. It will make it easier to complete the next step.
- Optional: Glue popcorn onto the cob. This makes the craft a bit more difficult, so may not be appropriate for large groups of 2 and 3 year olds. Alternatively, for kids that young, you can scrunch up 1 inch pieces of yellow tissue paper to act as the kernels.
Templates:
- After printing, close the template window to return to the main page.
- If the template doesn’t fit on one page, adjust your printer margins:
• In most browsers: Print → More settings → Margins → Minimum
• Or use Page Setup / Printer Setup in your printer dialog
Template (color) or (B&W)
Printable version of these instructions